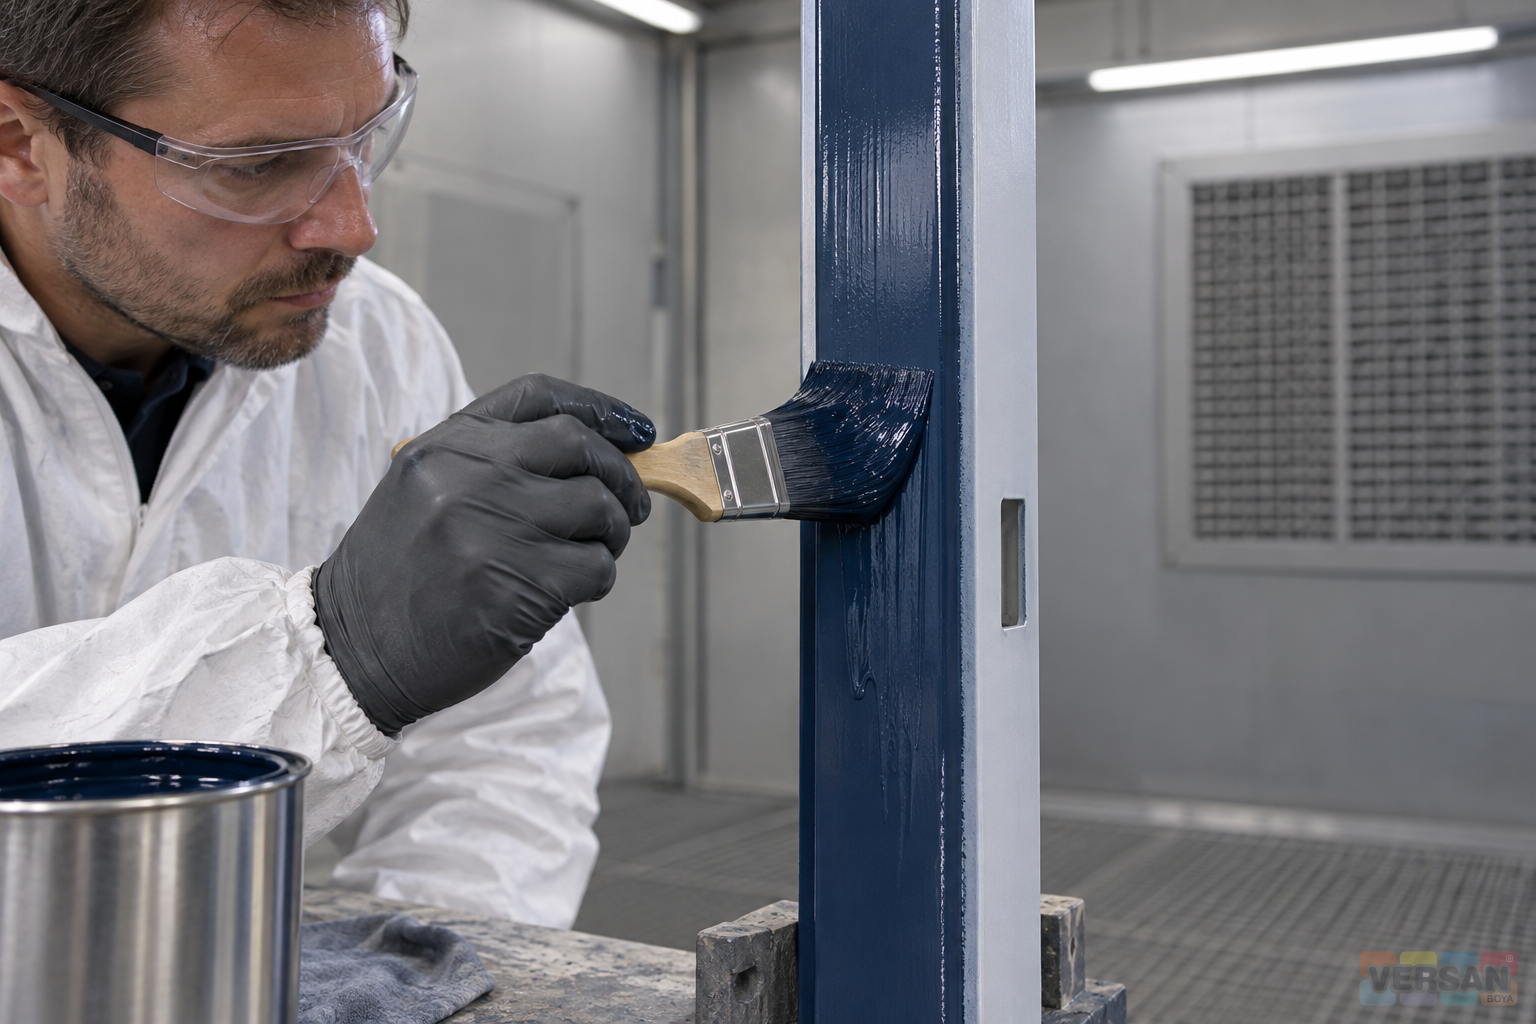
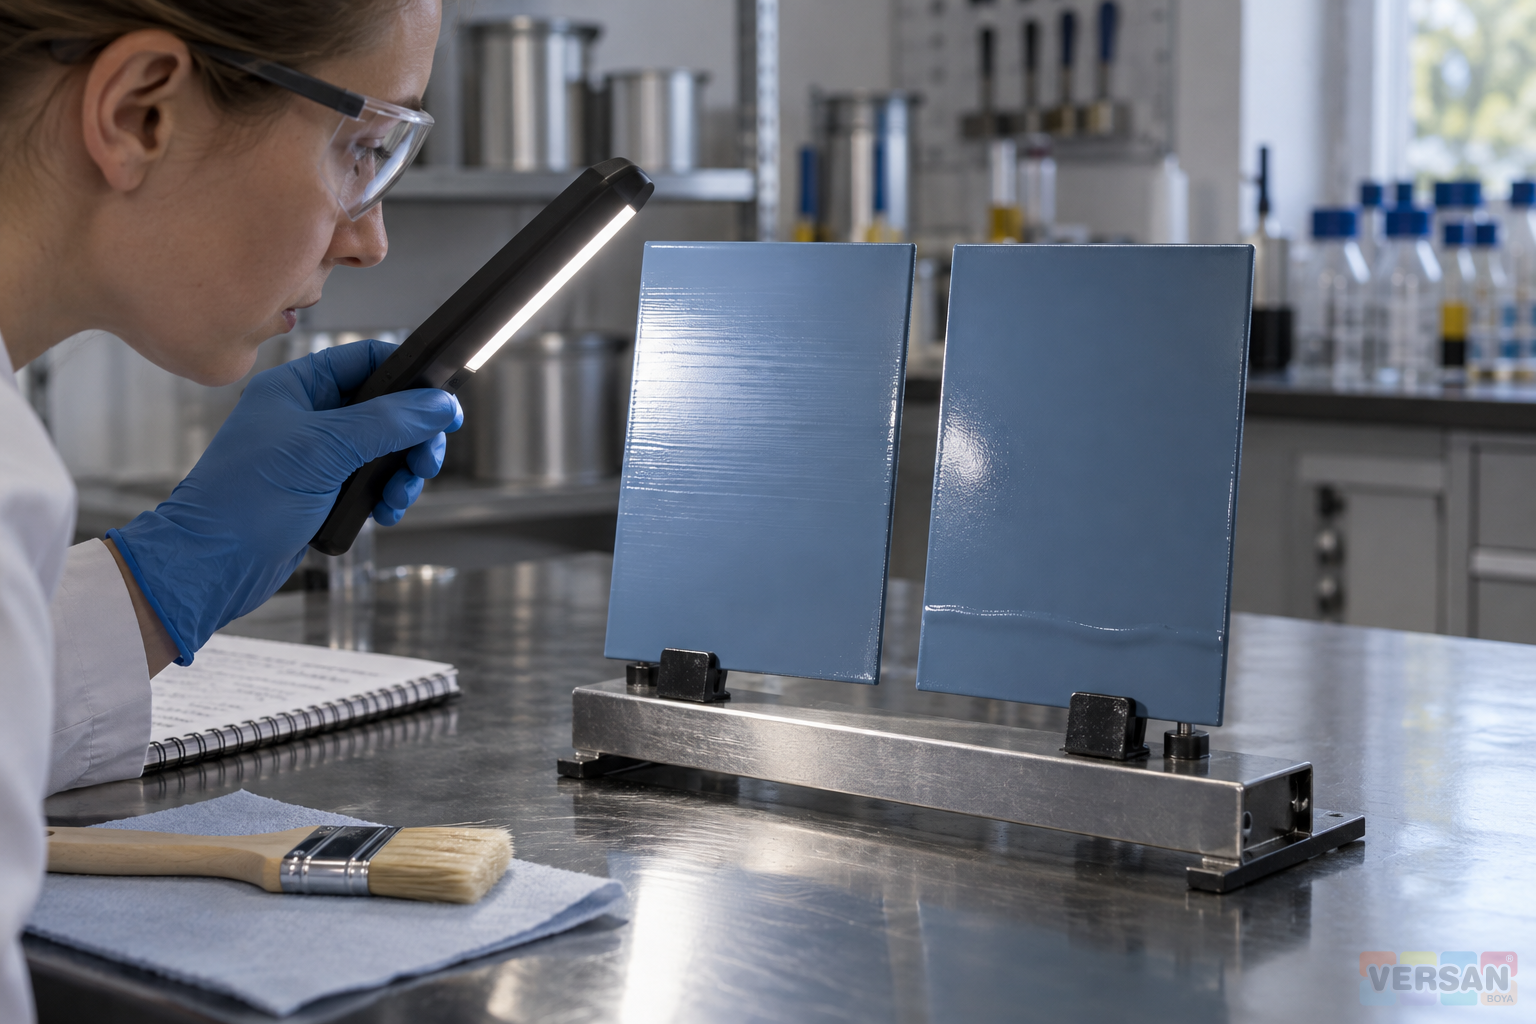
Brush marks and sagging describe different features of a painted surface. Brush marks may follow the direction of application or a later attempt to smooth the film. Sagging involves local movement and accumulation of coating, often visible as a ridge or run below the area where material was deposited. Both features can occur on one component, but adding more thinner is not a reliable response to either observation. Diagnosis starts by recording the shape, position and timing of the defect.
When applying a synthetic enamel topcoat, the objective is a consistent finish over a correctly prepared substrate, using the product's specified method and conditions. A surface that looks glossy immediately after brushing has not necessarily met that objective. This guide sets out a practical inspection sequence and a controlled approach to corrective trials. The examples are decision scenarios, not reports from an identified customer site, and they do not replace the current technical instructions for the selected coating.
1. Distinguish lines, raised texture and downward movement
Inspect the component from more than one direction under suitable lighting. Fine parallel lines following brush movement are different from a ridge collecting at a lower edge. A broad colour variation may not involve raised texture at all. Take an overall photograph and a separate detail photograph, keeping the light position reasonably consistent. Include enough surrounding geometry to identify the affected area. Without this context, a close photograph of a reflection can make the same feature appear to be a different defect.
Establish whether the observed texture belongs to the new coating or is being reproduced from the underlying surface. Changing the brush will not necessarily remove marks already present beneath the finish. Reflections on a product such as luxury synthetic enamel can make surface texture more apparent; this alone does not establish that the product choice was wrong. Appearance should be assessed under agreed viewing conditions. An unusually close photograph under incidental lighting should not become the sole acceptance criterion for the entire job.
2. Record when and where the feature appeared
A mark seen during application carries different information from one first noticed after drying. If the initial pass looked even and the surface became lined after a finishing pass, investigate the sequence of work. If the film initially looked balanced but later accumulated below, examine material distribution and the conditions during that interval. Record the application time, component orientation and last intervention. A photograph without an identified stage of the process cannot establish a definite cause on its own.
Describe the location precisely: centre of a flat face, profile junction, corner, lower edge or area around a fixing. A recurring local defect may need a different investigation from a feature distributed across the whole surface. The guide to edges and welds in metal coating considers the importance of geometry in inspection. Here, geometry also helps explain where the brush deposits material and where separate passes overlap. Corrective action should examine how the component was coated as well as which material was used.
3. Check the underlying surface before changing the brush
An uneven, contaminated or inconsistently absorbent surface can complicate uniform application. Inspection should therefore go beyond touching the component and deciding that it seems clean. Review the preparation method, any delay after cleaning and the present condition of the underlying coat. Identify loose old coating, surface damage and inadequately prepared repair boundaries. Repeatedly working the fresh topcoat is not a substitute for correcting these conditions. Keep the preparation record connected to the component so that the investigation is based on more than recollection.
Where synthetic primer has been applied, assess its suitability, drying condition and readiness for overcoating against its own instructions. The same approach applies to maintenance work over anticorrosive primer. The antirust and synthetic primer guide discusses that preparation sequence further. Including the underlying coat in a topcoat defect investigation helps avoid repeated repainting of an unresolved surface. A new layer may temporarily change the appearance while leaving the original preparation problem in place.
4. Match the brush to the product and the geometry
A new brush is not automatically a suitable brush. Its bristle construction, width, shape and access to the working surface should fit the coating instructions and component geometry. An unnecessarily large brush on a narrow profile may deposit material into junctions that are difficult to control. A very small tool on a broad face may increase the number of passes and opportunities for reworking. Record the type and size used in the trial, rather than relying on a general description such as the usual workshop brush.
Check cleanliness, bristle condition and residue from previous operations. Hardened material in a tool can make the origin of new lines harder to establish. When reviewing a semi-matt synthetic finish, do not define acceptable texture solely by comparing it with a high-gloss sample. Evaluate the chosen tool on the actual surface and against the intended finish. Selecting a better brush does not justify application outside the permitted conditions, and a tool change should be recorded separately from any change in material preparation.
5. Observe brush loading and deposited material together
Sagging cannot be explained solely by saying that the mixture was too thin. Observe how much material the brush carries and where that material is released. Initial contact, changes of direction and lower edges are useful places to inspect. Instead of instructing the operator simply to use less paint, identify the area where accumulation appears. Compare the loading and movement used on a flat face with those used at a junction. This makes the trial specific enough to repeat and evaluate.
The objective is not to apply the smallest possible amount of coating. An excessively thin application may also fail to provide the expected appearance or hiding. Follow the specified application method and coating build for the product, including a matt decorative synthetic finish. Do not attempt to conceal every irregularity in one heavy pass when the system calls for a defined coat sequence. Preserve the method that produced an accepted sample, not just its photograph, so that the result can be reproduced on subsequent components.
6. Treat thinning as a controlled variable
Adding thinner immediately when the brush feels difficult to move may obscure the original problem. First review material temperature, mixing, brush suitability and the underlying surface. Use synthetic thinner only with an approved coating pairing and a defined measurement basis. Record the initial addition and all later adjustments cumulatively. If the actual total is unknown, the mixture should not be treated as equivalent to an earlier accepted sample. Another unrecorded addition increases uncertainty rather than providing a controlled correction.
Similar names within the thinner product group do not make different families interchangeable. Sherwin-Williams lists overthinning among possible contributors to sagging, alongside heavy application and environmental conditions. Accordingly, a sag does not by itself prove that the thinner quantity was wrong. Investigate the recorded variables together and test a defined change. General defect guidance from another manufacturer can help organise the investigation, but its product-specific application values must not be transferred directly to a Nanomix coating.
7. Separate air, substrate and material conditions
A single workshop thermometer reading may not describe the condition of the component or the paint in its container. A profile beside a window can experience different conditions from another component further inside. The work instruction should state how the relevant conditions are checked. Record direct sunlight, noticeable airflow and changes in the working area in relation to the application sequence. If the conditions are outside the product's limits, establish suitable working conditions rather than attempting to compensate with additional thinner.
The Nanomix synthetic paint catalogue archive emphasises clean, dry preparation, mixing and avoiding excessive drafts. These points provide useful inspection questions for alkyd systems; they do not assign a universal temperature or waiting period to every product. Check the current technical document before trial application. Ventilation and other safety controls must remain consistent with the safety data sheet and workplace assessment. They should not be disabled to improve appearance, even when uncontrolled local airflow is being investigated as a possible application variable.
8. Examine later attempts to smooth the film
A small visible line can encourage repeated brushing over the same area. However, intervention without regard to the film's condition can create marks different from the original observation. Sherwin-Williams identifies reworking partially dried areas and excessive working among possible contributors to brush and roller marks. Separate the first application from the final corrective pass in the record. A line introduced during a later intervention should not be attributed automatically to the first contact of the brush or to the initial paint preparation.
A trial plan should define when the operator stops as well as how application begins. If each component receives a different improvised correction, the results will not be comparable. Test an approved method on a defined small area; when the film is no longer suitable for that intervention, make a separate repair decision. Working habits from an earlier job using industrial rapid paint should not be transferred automatically to a synthetic enamel. The selected product's own application and recoat instructions govern the sequence.
9. Review corners and junctions on vertical work
A frame, railing or fabricated profile contains more than flat faces. Corners where the brush turns and junctions between two faces require an explicit application sequence. If sagging repeatedly occurs at the same lower corner, examine how many passes deposit material there. Assigning the entire problem to paint consistency without recording that sequence can reproduce the same defect with a newly prepared mixture. Where practical, the trial component should include the relevant geometric detail rather than using only a flat panel.
If a different painting orientation or temporary horizontal positioning is considered, assess its effect on production, access and subsequent handling. A satisfactory horizontal sample alone does not resolve an issue observed during vertical application. Compare samples in the same orientation when testing that issue. On an existing job with another undercoat, such as rapid primer, confirm system compatibility before copying a previous procedure. Reviewing geometry complements the coating system check; it does not remove the need to establish whether the layers are suitable together.
10. Distinguish wet-film intervention from repair after drying
Identify the film's stage before choosing an intervention. An application that remains workable and a dried surface with pronounced texture do not require the same repair approach. Avoid arbitrary solvent wiping or pressing fresh paint into a defect outside the product's permitted process. For a dried surface, consider the defect depth, condition of the underlying coat, required preparation and recoating instructions together. A photograph may support that assessment, but should not be the sole basis for issuing one repair instruction for every component.
Evaluate preparation and recoating on a small trial area first. If the operation exposes an underlying layer or the substrate, review the coat sequence accordingly. Where the identity or hazardous constituents of an old coating are unknown, select abrasion and cleaning methods through competent assessment. Cleaning thinner should not be presented as a universal means of safely removing dried defects. Cleaning, surface correction and repainting are separate operations, and a material suitable for one purpose is not automatically approved for the others.
11. Test a correction by changing one variable
Retain a reference representing the previous application and keep conditions other than the investigated variable as consistent as practical. If brush type is being tested, do not also change paint preparation and substrate condition in the same comparison. When the result improves, describe the conditions under which it was obtained. Keep unsuccessful trial records too; they show which approach did not resolve the issue. Reusing one photograph for several trial identifiers undermines the comparison and makes later acceptance decisions difficult to trace.
The record can include the original defect location, application sequence, brush identity, cumulative thinner addition, environmental conditions and component orientation. Assess line visibility, sagging, hiding and readiness for subsequent operations separately. An improvement in one characteristic should not conceal deterioration in another. Consult the alkyd, synthetic and rapid paint selection guide if a change of coating family is being considered. A trial focused on an application defect cannot by itself establish the suitability of a different coating system for the service environment.
12. Transfer an accepted result into a clear work instruction
When a sample is accepted, record more than a verbal statement that it looks good. Define the surface, preparation and lighting used for evaluation. Connect the sample or component identifier to its application record. Specify the production method, tool and person responsible for approving changes. Keeping first-piece checks and later shift checks in the same job record helps identify changes during production. It also avoids relying solely on a final photograph that does not show how the process developed.
Use the full names of the coating and auxiliary materials selected from the product range in the work instruction. Establish which checks must be repeated for a new colour, primer or component geometry. Appearance acceptance does not mean that the component is ready for packaging pressure or installation handling; those operations require their own release checks. Written handover of unresolved questions reduces the chance that different operators will attempt incompatible corrections on the same batch of components.
13. Use short scenarios to define the first investigation question
Consider a hypothetical component with fine parallel lines across a broad face but an even film at the lower corners. The first question is whether the lines appeared during the initial pass or during later smoothing. Compare brush condition, application timing and underlying texture. If the effect of a brush change is being investigated, hold the other conditions steady. Evaluate the result beside the reference under comparable lighting and viewing conditions. A mark that is less visible only because the lighting changed does not demonstrate an improved application.
In a second scenario, the issue appears only at the lower junction of a vertical profile. Investigate material carried into that point from adjoining faces, brush loading and the application sequence. In a third scenario, all components become more difficult to brush during the afternoon. Compare material holding history, temperature, airflow and preparation records. In either case, replacing a product unrelated to the observed change may complicate diagnosis. State the question the trial is intended to answer before deciding which variable to change.
Effective management of brush marks and sagging depends on describing evidence accurately rather than searching for one universal adjustment. Location, timing, surface condition, tools, mixture preparation and working conditions together support a more focused correction. Provide these records with overall and detail photographs when requesting technical support. Validate the proposed method on a small area before extending it to production. The useful outcome is a repeatable process that produces the agreed result, with clear limits and acceptance criteria that the next operator can understand.
Technical sources and scope
- Nanomix synthetic paint catalogue archive, page 12: surface preparation, mixing and application conditions.
- Nanomix thinner catalogue archive, page 42: separate functions of reducing and cleaning products.
- Sherwin-Williams — Brush and Roller Marks: reworking partially dried films and application tools.
- Sherwin-Williams — Paint Sagging: general application factors associated with sagging.