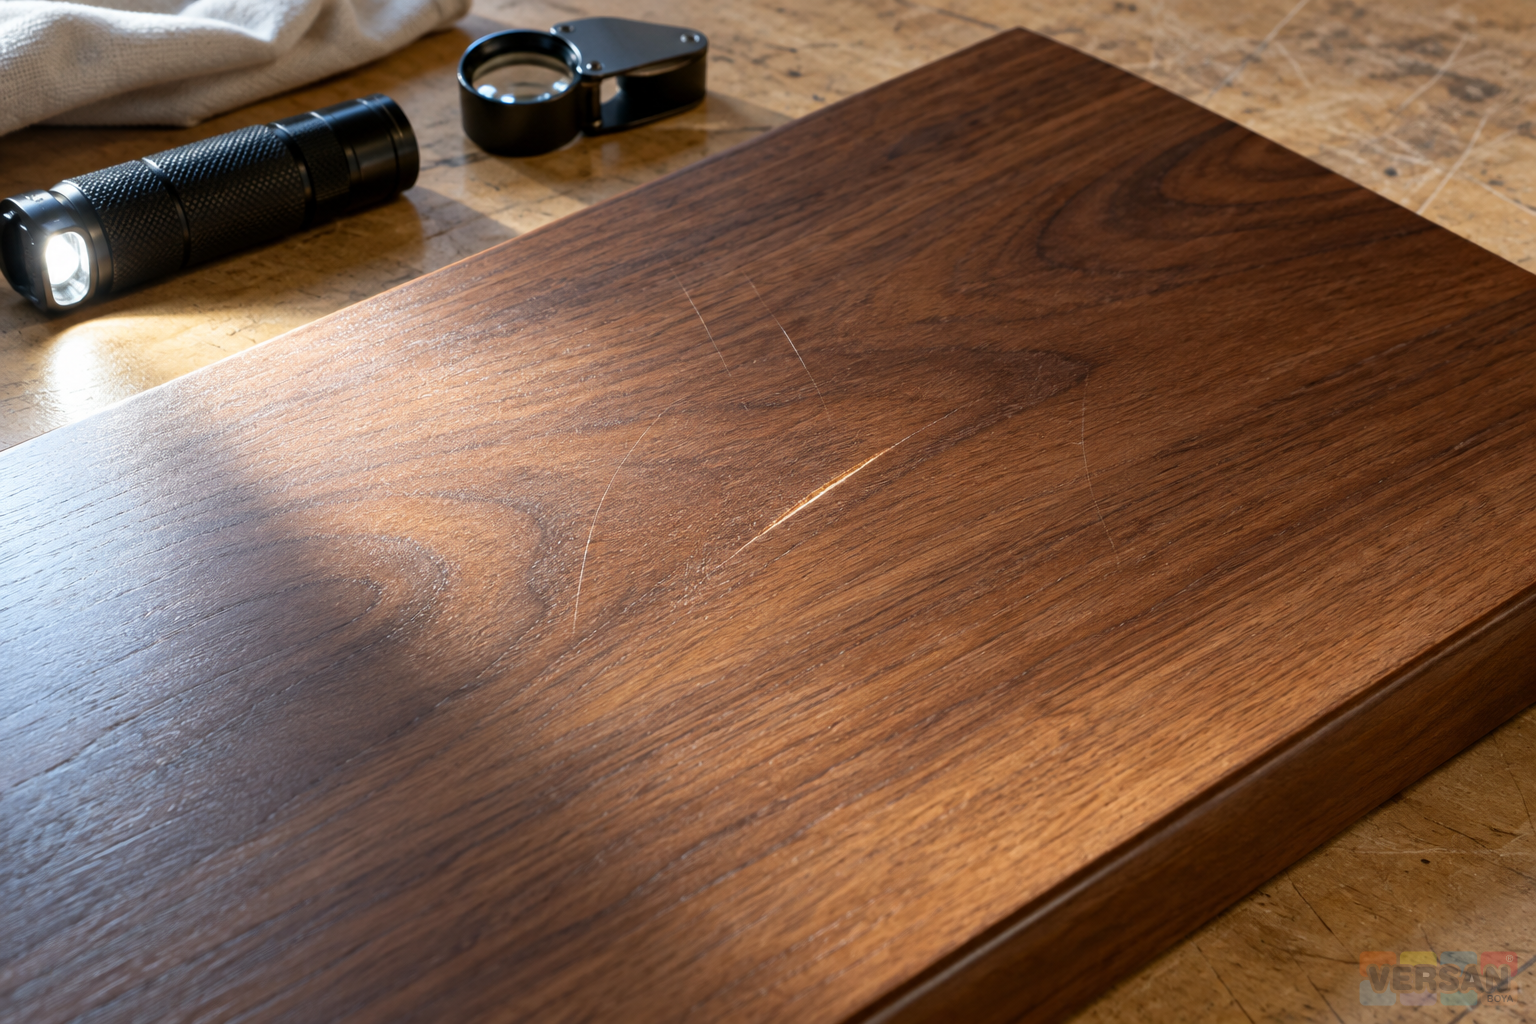
A scratch in a clear-finished table, cabinet door or timber panel does not describe one predictable repair. A fine mark that appears only in a reflection presents a different problem from a cut through the finish into coloured wood. Selecting a varnish before establishing that difference can turn a small cosmetic concern into a much larger refinishing exercise. A useful local repair must address the damaged area while producing an agreed relationship with the surrounding finish, including its sheen, colour and texture.
This guide sets out an assessment and trial approval process for surfaces believed to carry nitrocellulose varnish. It does not prescribe abrasive grades, thinning ratios, application settings or waiting periods. Those belong to the current product instructions, the condition of the existing coating and a manufacturer-supported repair method. The Nanomix Nitrocellulose Varnish page is a starting point for product enquiries. Its availability does not establish what is already on a particular item, or prove compatibility with every older clear finish.
Start with an object record rather than an application instruction. Identify the item, the faces concerned, the service environment and the visual result the owner expects. Different parts of one furniture set may have been manufactured or repaired at different times. A matching appearance is useful evidence, but it is not a reliable history of every layer. The wood and furniture coatings range helps organise the product discussion without replacing the separate investigation of the existing surface.
Establish what is known about the existing finish
Collect original production records and later maintenance notes where they exist. Record the product name, clear or tinted version, sheen designation, batch information and application date as separate fields. A workshop may use several finish families during the same period, so an unopened container currently on the shelf is not proof of the coating on an older cabinet. If the history is missing, retain that uncertainty explicitly. Writing “existing coating not confirmed” is more useful than creating a confident but unsupported product identification.
A transparent-looking topcoat does not mean that every layer beneath it is colourless. Stain, filler, previous touch-up work and maintenance residues can influence the appearance of a scratch. Do not assign a pale line or a dark boundary to the final varnish alone. Photograph edges, joints and less exposed areas as well as the main face. Where veneer, solid timber and edging occur on one item, identify them individually so that a repair proposal does not silently assume an identical substrate throughout.
A broad product description also needs careful interpretation. A furniture varnish category is relevant to an enquiry, but it is not a statement that its products can be applied directly over an unidentified nitrocellulose film. Provide the supplier with photographs, the intended use and the available history. Similar colour, a familiar product name or a shared furniture application should not replace written consideration of the complete coating system and the proposed intervention.
Record the mark and the viewing conditions separately
Document the surface before disturbing it. An overall photograph locates the defect; a close view shows its character; another view records the direction of the light. A flash photograph can exaggerate a fine mark that is unobtrusive in ordinary use, while a distant image may conceal exposed timber. Repeatable camera positions help later comparison with the trial. Use filenames tied to the item identifier, so photographs of similar doors cannot become detached from their inspection records or mistaken for different stages of one repair.
Use simple observation categories: a change in reflection, a visible line in the film, loss of colour, exposed wood or a crushed edge. These are practical descriptions rather than laboratory diagnoses. Length alone does not determine the significance of a scratch. A short mark on a prominent front face may be more objectionable than a longer mark on a concealed edge. Record the viewing direction, ordinary observation distance and location of the item, rather than expecting a single close-up to define the acceptance standard.
Look around the scratch for lifting, cracking, local swelling or wider wear. A small line can coexist with a larger problem in the existing coating. In that case, concentrating only on concealing the line leaves the wider condition unanswered. The purpose and extent of local work should be reconsidered before a method is approved. The earlier guide to refinishing furniture with an existing coating provides a complementary discussion of identifying the old finish and defining an appropriate trial area.
Treat cleaning as a separate technical decision
Dirt or maintenance residues can make a mark harder to assess. That possibility does not justify wiping an entire surface with an arbitrary solvent. Cleaning must be considered against the sensitivity of the existing film and the information supplied for the proposed materials. A controlled assessment in an inconspicuous location differs from treatment of the principal visible face. Record the material, cloth, contact method and result before extending a method. If the observation is ambiguous, preserve the original evidence and seek technical advice.
Nitrocellulose thinner is not automatically an appropriate cleaner for finished furniture simply because its family name matches the suspected varnish. Likewise, the equipment cleaning thinner page concerns a different task; its inclusion is not a recommendation to wipe the object. An unsuitable cleaning experiment can alter the appearance and make the original damage harder to interpret. When the approved method is unknown, enlarging the experiment is a poor substitute for obtaining a supported repair proposal.
Small quantities do not remove the need to plan solvent work. HSE's solvents guidance emphasises assessment of the product, application method and exposure controls, including suitable ventilation. It does not supply one protective equipment specification or clearance interval for every task. Consult the current safety data and the workplace assessment before preparing trials. This guidance is a technical reference, not a statement of Turkish legal requirements. If a suitable work area and controls are unavailable, postpone application rather than treating a cosmetic trial as an exception.
Make the trial answer the actual repair question
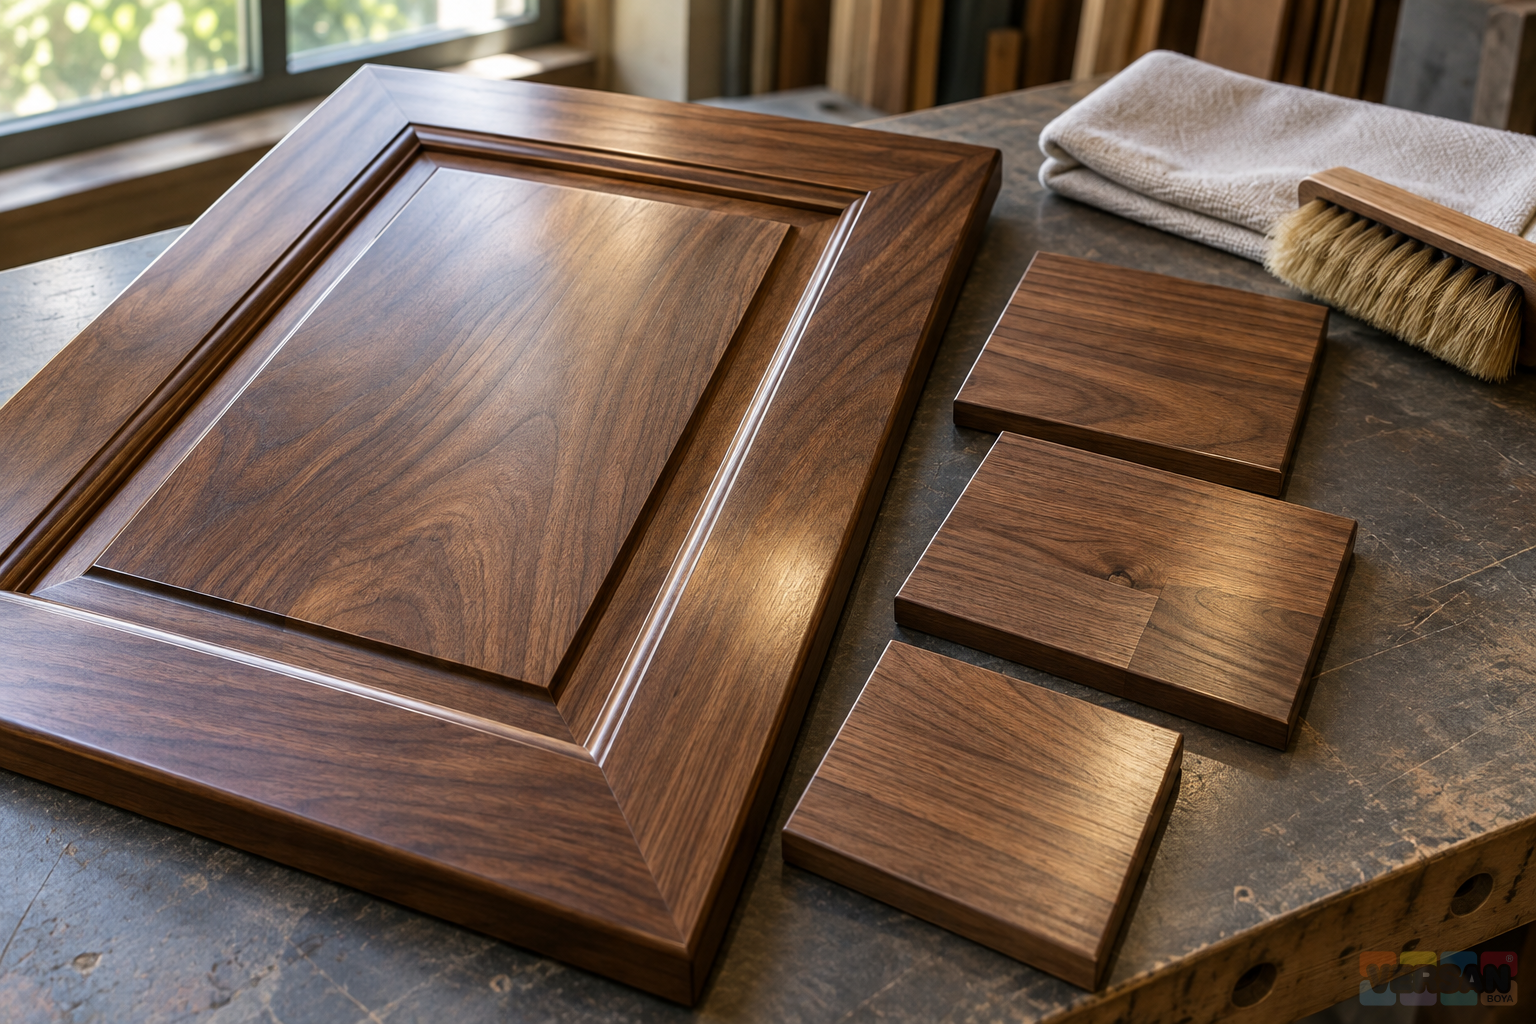
An attractive new timber offcut may be a poor model of an aged cabinet. Establish how closely the trial represents the substrate, colour history, surface texture and coating already present. Use representative material where available and document unavoidable differences. A successful coating on new bare wood does not show that a small transition will disappear within an older film. Those trials answer different questions. The record should explain which question each sample addresses, rather than presenting all good-looking panels as equivalent evidence for the proposed repair.
Avoid changing several variables at once and then attributing the result to one of them. Identify a control area, the intended treatment and the transition boundary. If cleaning or preparation is varied, distinguish the versions clearly. Record material identities and document revisions on the sample card, and connect the physical sample with its photographs. Do not rename an unsuccessful trial as an approved reference after further work without retaining the history. An honest sequence of observations is useful when a later decision needs to be reviewed.
The thinners and auxiliaries range is relevant because the complete proposed method includes supporting materials as well as the clear finish. Quietly changing a thinner between samples makes the comparison less reliable. Do not derive ratios or mixing instructions from a general family description. The purpose of a trial is to assess the appearance and practical limits of a technically supported method on this item, not to develop an unverified formulation or establish compatibility through product names alone.
Define the repair boundary as well as the scratch
A narrow intervention that covers the entire scratch can still leave a conspicuous patch. Mark the proposed transition and its endpoint on the assessment drawing. A door edge, component division or joint may offer a useful location for evaluation, but it is not automatically a suitable repair boundary. The manufacturer-supported method and the trial result should inform the decision together. Consider the front, edge and reverse separately where needed, and agree whether differences between those faces are part of the acceptance discussion.
If the defect reaches the timber, adding a colourless film alone may not address the visual loss. Any proposed colour or texture correction should be identified as a separate element of the work. Where veneer thickness and previous sanding are unknown, obtain an appropriate assessment before authorising abrasive intervention. Attempting to remove a visible line can change the substrate or surrounding colour, expanding the job beyond a minor repair. The initial enquiry should leave room to change the scope when the investigation reveals that risk.
A useful decision record might compare leaving the item as it is, undertaking a supported local repair trial, or evaluating complete refinishing of the affected component. This is a way to organise alternatives, not a mandatory sequence for every object. For each option, state the anticipated appearance, important uncertainty, physical boundary and review point. The owner can then consider more than the narrow question of whether a line will disappear. The resulting approval also identifies which option and which limitations were actually accepted.
Colour, sheen and texture require different observations
Colour similarity is only one element of an acceptable repair. Observe sheen, reflection sharpness, pore appearance and any halo around the transition individually. A panel that looks satisfactory facing a window can appear different when illuminated across the surface. Plan assessment under conditions representative of the item's ordinary position, as well as at the workshop bench. Agree the reference sample and viewing direction in advance. Photographs are valuable records, but they cannot be assumed to reproduce every visual difference perceived during direct examination.
The separate catalogue descriptions for gloss polyurethane varnish, silk-matt polyurethane varnish and matt polyurethane varnish illustrate distinct appearance objectives. These links do not recommend switching chemistry for a touch-up over nitrocellulose. A change of family requires assessment of the whole system and an appropriate refinishing plan. An archived sheen designation should not be treated as a measurement of an existing object or a current declaration of suitability for it.
Clear finishes are seen together with the timber beneath them. The finishing chapter of the USDA Wood Handbook provides general context for the relationship between wood, surface preparation and finish appearance. It supports thoughtful sample selection, not a universal repair recipe for every scratch. The related article on pores, filling and sanding in nitrocellulose varnish helps distinguish the intended surface texture from a defect. Keep those two issues separate when agreeing what the trial should demonstrate.
Set a clear decision point after the trial
Do not base approval solely on the first attractive reflection after application. Choose the observation time from the current product instructions and the work conditions. Record scratch visibility, colour continuity, sheen, transition appearance and edge condition separately. A single word such as “good” does not explain what was assessed or accepted. If observers disagree, clarify the viewing conditions and acceptance description before changing the treatment. Moving to more flattering lighting without recording it is not a technical resolution of a visible difference.
An unresolved feature on the trial should not be assumed to disappear when more material is used on the real item. If the transition remains obvious, the old finish reacts or the colour mismatch becomes more pronounced, the local method may need to be suspended. That does not necessarily end the project; it creates a reason to revisit scope or appearance expectations. Defining stop conditions beforehand helps avoid an improvised decision once work has started on a prominent component and the options have become more restricted.
If another system is being investigated, the polyurethane varnish and acrylic varnish information can frame questions to the supplier. They are not presented as directly compatible overlays. Similarly, a decorative wood varnish may concern a different intended use. Base the decision on the specific item, service requirements and written system assessment. Treating every clear product as interchangeable removes the very distinctions that the trial is intended to examine.
Connect the quotation, approval and handover record
The quotation should identify the components and faces involved, together with the trial and approval stage. Separate local work from complete component refinishing instead of hiding both inside one uncertain line item. Allocate removal, transport, protection, refitting and access responsibilities. If investigation changes the scope, the original assumptions will remain understandable. A photographed defect map also provides a reference for distinguishing previously recorded damage from later observations, without claiming that photographs alone settle every question about condition or responsibility.
At handover, compare the finished component with the approved sample under the agreed conditions. Retain the sample identifier, system identity, document revision, date and any accepted visual differences. Explain first use and cleaning requirements from the current product information rather than inventing a universal waiting period or durability promise. Future maintenance should begin by consulting this record. That allows the next enquiry to start with known materials and accepted boundaries instead of repeating the original uncertainty about the surface.
A sound local repair decision therefore combines documented damage, an investigation of the old finish, a supported method tested on a sample of known representativeness, and an agreed acceptance boundary. Where the appearance objective needs further discussion, consult the guide to matt, silk-matt and gloss furniture finishes. For a useful technical enquiry, provide the item photographs, available coating history and the result expected from the trial together. Product identity is important, but it is only one part of that decision.
Technical sources and their limits
- Nanomix archived varnish catalogue: distinct product families, not a current nitrocellulose repair instruction.
- USDA Wood Handbook, Finishing of Wood: general wood finishing context.
- HSE, Solvents: task-specific exposure control reference, not a declaration of Turkish legal compliance.