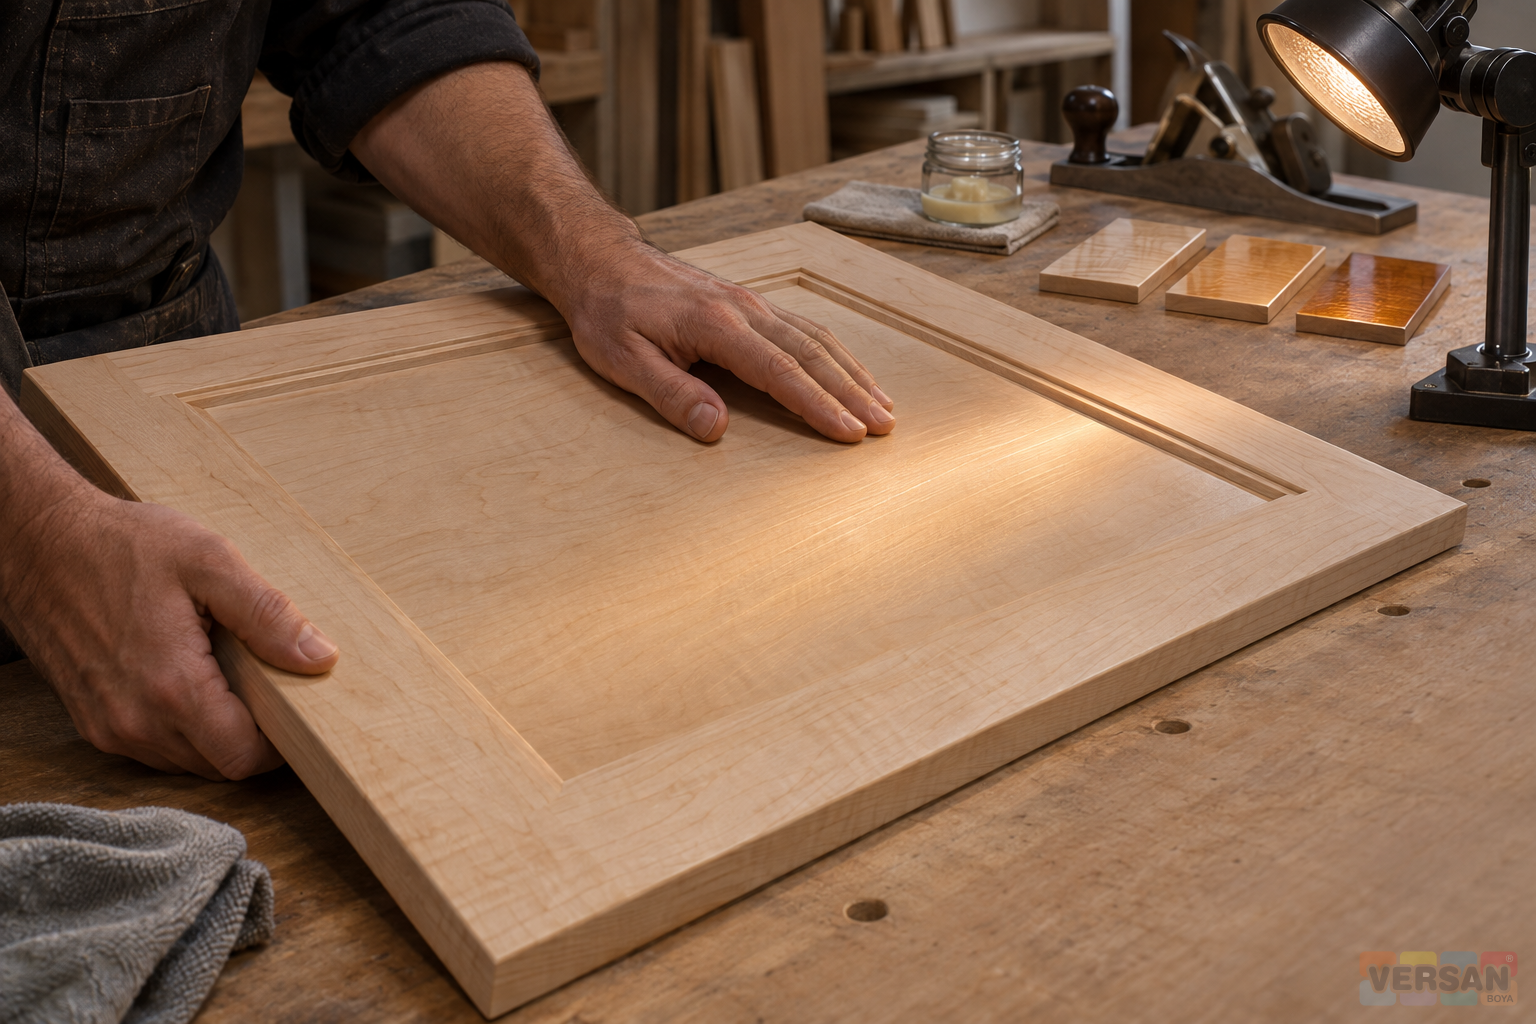
A wood panel can look uniform under the broad light above a bench and show a series of arcs as soon as it is stood on edge. A line crossing the grain may be an earlier sanding mark, but the surrounding wood can produce patterns that look just as deliberate. More sanding on the strength of that first impression can change the figure or remove material at an edge. Applying the topcoat in the hope that it will hide the mark carries the opposite risk: the issue may remain visible after a much larger amount of work. The useful question is which feature you are seeing, how it responds to the intended finish and what evidence justifies releasing the part.
This guide begins at the inspection point before a clear topcoat. The NanoMix varnish archive gives polyurethane and acrylic examples; it is not a technical data sheet for this nitrocellulose varnish. The thinner archive identifies the nitrocellulose thinner separately. Read the current instructions for the selected system alongside the NanoMix nitrocellulose varnish entry before deciding how to proceed. Where those instructions permit a thinner, use the NanoMix nitrocellulose thinner entry to identify the separate component. Wiping the panel with thinner to preview the finish can change the existing surface and is not a substitute for a witness sample finished in the specified sequence. An inspection must let another person repeat your comparison without first changing the part.
Establish the view before inspecting the mark
Set the part up as it will normally be seen. A cabinet door that lies flat at the bench presents a different reflection when fitted vertically. Under broad light, check the complete face and the relationship between adjacent pieces. Then move a light source so that light falls at a shallow angle across the surface, checking from two directions. A mark can disappear when the light runs along it and become clear when the light crosses it. Finally put the finished witness piece alongside the work and repeat the same views. Changing the illumination, viewing position and workpiece orientation together makes it difficult to tell which change produced the difference.
Keep enough distance from the work to see where a line sits within the whole panel. Then move closer to distinguish its shape. A close photograph helps show whether a short line curves across two grain features. A wider photograph shows whether it is in the centre of the face, in a band beside an edge or next to a moulded feature. A bright reflection can cover the very mark you meant to record. Check the photographs while the setup is still in place and keep the light direction identifiable. Compare sample and work in a single frame where possible; automatic exposure can make separate photographs look quite different even where the surfaces match.
If two adjacent doors show different brightness beside a window, exchange their positions without changing their orientation. If the difference stays beside the window, examine the light and the surrounding reflections first. If it follows one door, inspect that face more closely and compare it with its witness sample. This simple test is helpful where the acceptance discussion has become a dispute about the finish rather than a reproducible observation. Decide in advance whether the texture and gloss are to be judged together or separately. The guide to matt, silk matt and gloss varnishes helps define the intended appearance before you prepare the comparison.
Separate a scratch from grain, dust and handling damage
Grain and pores can form short lines that change direction with the surrounding pattern. A scratch may cross several parts of that pattern at a consistent angle, repeat in a series of arcs or stop where a tool changed direction. Treat these shapes as clues, rather than as a test with a single result. Rotary cut veneer can show broad curves that look like tool marks, and a scratch parallel to the grain can be easy to miss. Compare the feature with the nearby figure under both lighting directions. If its origin is still uncertain, use the handling and preparation history to identify which processes could have reached the affected area.
A particle left between the panel and bench can produce a single mark that bears little resemblance to the main sanding pattern. Look for matching evidence where the part was held, supported or turned. A short abrasion repeated at the same point on adjacent items may follow a rack or an edge guide. If something on the surface moves or disappears after cleaning with the method permitted by the coating instructions, record it separately from a line that remains fixed. Neither an apparent colour change nor the brief disappearance of a line when wet identifies its origin. The difference matters because dust calls for a different remedy from material that has already been removed.
Some parts arrive with an existing finish, particularly in furniture refinishing. A mark that sits in that finish and a mark cut through to the underlying wood create different starting conditions. Confirm what remains on the panel and what the intended system accepts before preparing a comparison. The guide to compatibility with existing furniture coatings covers that earlier decision. This inspection does not establish adhesion or compatibility merely because a surface looks even. Carry a record of the coating state into the decision so that a staff member looking only at the photos cannot mistake a cosmetic result for approval of the system.
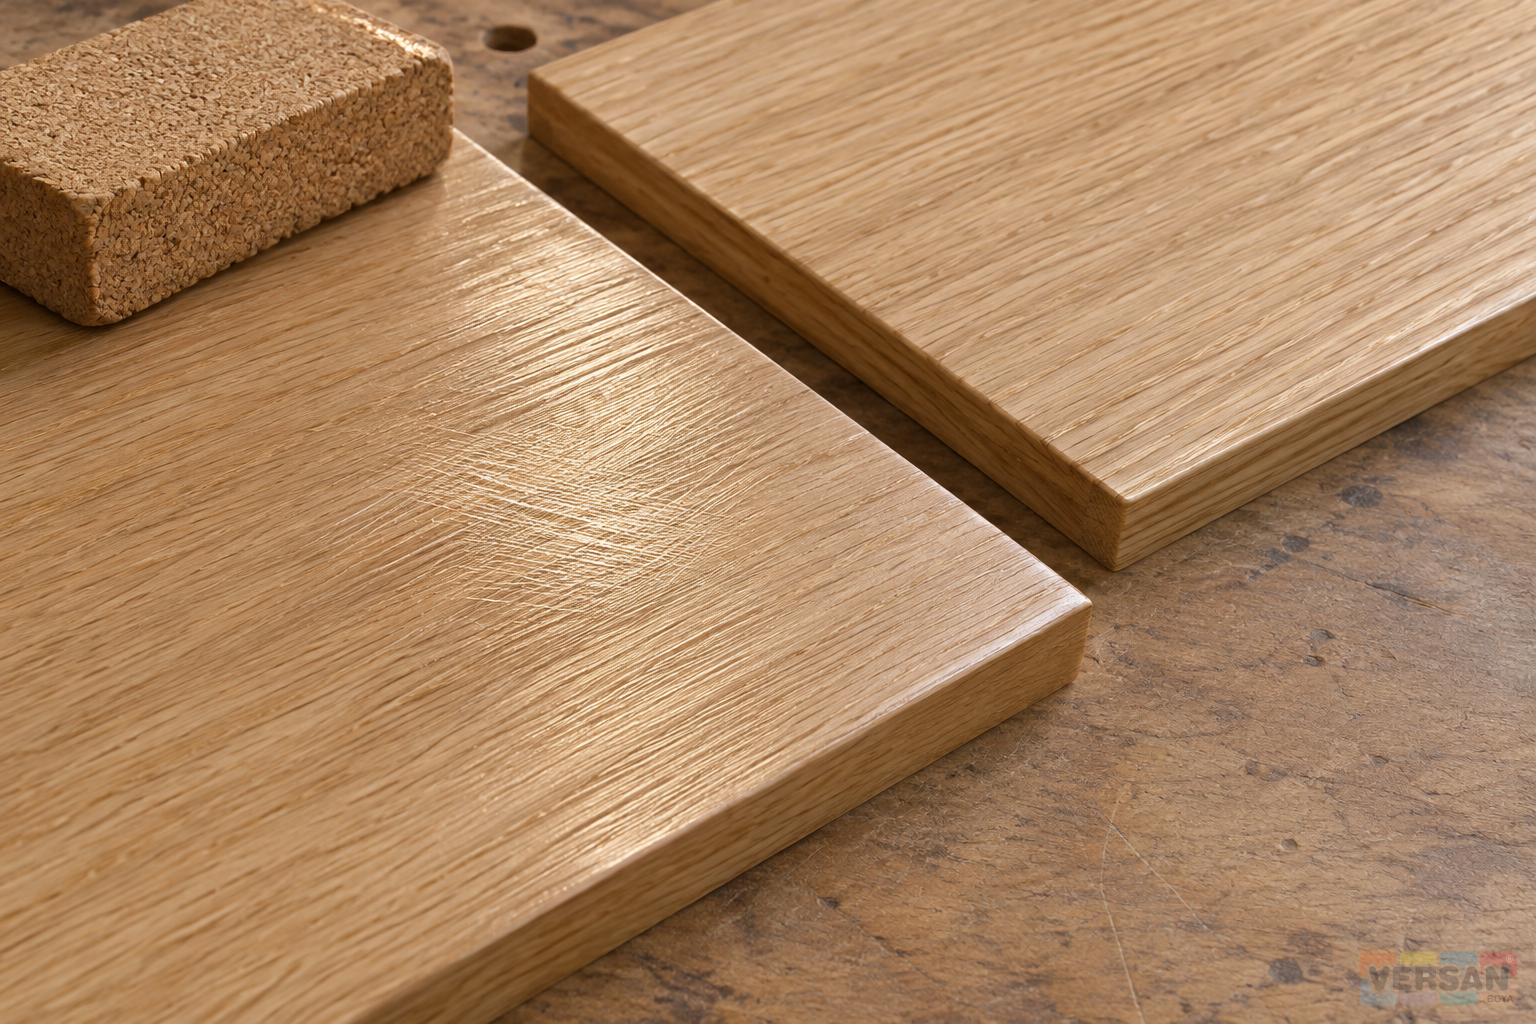
Treat the flat face, margin and profile as separate areas
On a flat face, a broad band of reflected light makes it possible to follow changes across the surface. Scan the centre and perimeter separately. The first contact of a tool, the end of a pass and a hand correction can leave different evidence in the margin. If a line is found, note its direction and the zone where it begins and ends. Check the opposite side under the same conditions. A single mark close to a handling point and a repeated pattern across the face deserve different follow-up. Record the extent before any correction so that the next inspection can tell if the mark has gone, remained or simply changed location.
A profile reflects light in several directions as its section changes. The angle that reveals a line on the face may tell you little about a groove or shoulder. Move the light along the length of the profile and compare the same section on another part. At a veneered edge, an unexpected colour change or interruption of the figure can be a reason to stop and check what has already been removed. Trying to make a scratch disappear by working that point again can create a more conspicuous change in shape or colour. Before any further preparation, identify the material and record which side of the transition still has the original finish or substrate.
The European Panel Federation guidance on lacquer finishes illustrates why MDF faces and edges need separate consideration. Its examples are specific to MDF and should not be transferred to veneer, solid timber or a different coating without the relevant instructions. The wood and furniture coatings category contains several types of coating, while the product range shows the wider catalogue. Record the panel construction independently of the finish. A door may have a veneered field, a solid lipping and a different material on the reverse. Even if all three receive the same colour target, they are three locations to check and may have different preparation requirements.
Identify the coating stage before choosing a response
A scratch visible in bare wood and a scratch visible through a dried sealer need different decisions. Before any coating, determine whether the damaged fibres are shallow and local or whether the feature extends across the surrounding figure. Decide whether a correction on a matched offcut preserves the appearance and thickness margin required by that part. Do not infer that a procedure which improved solid timber will work equally well on thin veneer. If the substrate is unknown, hold the part until it is identified. Nothing is gained by rejecting the surface in principle while making a physical change that removes the options needed to recover it.
If a sealer or another compatible preparation coat has been applied, identify where the feature sits. Removing a raised particle may reveal a line that was already underneath. A lighter point after sanding may tell you to examine the state of the film around the mark. If the product instructions have not released the intermediate coat for sanding, wait or resolve the reason under those instructions. Loaded abrasive can suggest that the timing or condition needs checking; it is not a drying test by itself. The guide to pores, filling and sanding before nitrocellulose varnish addresses the earlier preparation sequence. The present decision is whether the prepared state can move on to the finish.
A sample approved for opaque furniture paint has a different visual purpose from one approved for a clear coat. The nitrocellulose primer, matt nitrocellulose paint and gloss nitrocellulose paint entries show distinct product roles and appearance choices. They do not establish what can be put beneath the proposed varnish. In professional coating systems, product selection and acceptance of a prepared surface are linked but remain separate decisions. A coating may be appropriate to a specified use while the particular panel still needs inspection. A panel that looks acceptable under inspection lighting can still be unfit for an incompatible sequence.
Make the witness sample answer a specific question
A witness piece should match the work in the features that matter: source stock, grain direction, substrate and finish sequence. For a moulded part, include a representative transition or detail rather than trying to learn everything from a flat offcut. Identify each comparison area outside the measuring view so that the mark is not hidden. Retain one sample as prepared, and apply the permitted correction to its matched counterpart. Finish both according to the current instructions with the same appearance target. Change one factor in that pair, otherwise the comparison may show a difference without giving you a useful reason for it.
For a hypothetical example, take two pieces cut in sequence from the same veneered board. You notice shallow transverse lines under a low light on both. Keep those lines on one piece and assess a permitted correction on the other. When the pieces have reached the finish state specified for comparison, stand them alongside one another and compare the grain, colour and reflection from the same positions. Check whether the repaired area remains visible even if the scratch has disappeared. If it does, the trial has exposed a trade-off which a photograph of the uncoated piece would have missed. Decide whether there is a different permitted preparation step or whether the part should remain on hold.
Keep reference pieces identifiable if they are shared across multiple jobs. A sample of furniture varnish from an earlier project cannot stand in for a different substrate or finish just because the colour is similar. If the requirement is being reviewed, compare polyurethane varnish and acrylic varnish as separate systems. A product such as gloss acrylic varnish illustrates that sheen can be a separate selection within a family. The catalogue is a way to identify those options. Any change of system needs its own current instructions and a representative sample; clear appearance alone cannot demonstrate interchangeability.
Make the release record short enough to use
Give every affected face a clear status: released for topcoat, targeted review required or held for preparation. A released part has a known substrate and coating state and can be compared with a reference under the agreed views. A part requiring targeted review has a marked location and a named next action. A part on hold remains out of the finish sequence until the cause and correction have been assessed. A hold is particularly useful where cutting into the surface again would narrow the recovery options. Do not confuse a limited visual inspection with the decision to approve a different finish, material or gloss for the job.
The record can fit in a short line of a worksheet: part and face, substrate, coating stage, mark position, pattern direction, light direction, comparison sample, result and who is responsible for the next check. Use a position that survives turning the part around. A description such as the outside face, beginning above the handle edge, is less ambiguous than left corner. Include a wider image alongside a detail image if the record must travel between teams. The next shift should be able to put that same face back in the inspection position and find the same feature without relying on the first inspector’s memory.
An acceptance sample should settle what normal variation looks like for the job. A clear finish can intentionally show grain, pores and variation between boards. A repeated scratch in the same direction across unrelated grain calls for investigation even if someone finds the effect individually acceptable. Conversely, a natural feature seen only in a strongly magnified crop is poor evidence for rejecting an otherwise matching face. Return to the agreed viewing conditions and the comparable sample. If teams disagree, record the views in which they differ and resolve the acceptance rule before more parts are finished. It is easier to correct the shared reference than to sort a batch against inconsistent expectations.
Use the first piece to test the inspection setup
For a run of matching parts, decide what the first piece needs to prove. A flat sample can be useful for the main face, but it tells you less about a narrow leading edge that has been handled or dressed separately. Compare the finished sample with the first production part in their intended orientation and include the edges that remain visible after assembly. If a difference only appears under an inspection light, document that view and compare it to the actual approach or sight line. Define what must stay consistent across the run before releasing the remaining pieces, particularly where clean-looking faces can conceal a problem confined to a repeated profile.
If the setup changes, repeat the comparison on the same point rather than creating a new reference by accident. Sliding the light or moving the work to stop glare is useful, provided both the reference and the panel are viewed after that change. A record that says the surface passed should still let a colleague recover the relevant sample, faces and views. Different requirements for visible and concealed surfaces should be agreed with whoever owns the appearance specification. The first part can then act as a dependable working reference without implying that its results cover every material or geometry in the job.
Use a repeated mark to improve the next run
When several pieces show the same feature, group them by the conditions they share. Check whether they came from the same stock, went through the same setup or were handled on the same support. A pattern that begins at the exit edge of a sanding pass is a reason to review the end of that pass on a witness piece. If the defect appears on a different edge after the trial, the change may have displaced the mark rather than eliminated its cause. If it stays put, review earlier handling or a pre-existing substrate feature. Keep the lighting and sample constant long enough to tell whether your change affected the observed defect.
Use the thinners and auxiliaries category to identify the correct product family when the written instructions call for an approved auxiliary. Do not replace the inspection record with a guessed grit, drying interval or reduction ratio pulled from a different system. The durable result is a decision that can be seen again on the same part and sample, has a consequence the next worker understands and separates normal wood figure from a mark that needs action. Once the part passes that decision, the topcoat can be applied under the selected system’s instructions with a clear basis for later appearance checks.